How to stretch watercolor paper so it dries flat
Every watercolor painter knows the moment. The first big wash goes down beautifully, and then, as it soaks in, the sheet starts to rise in waves. Paint runs into the valleys and pools there. By the time it dries, the painting has hills, and the sky you laid so carefully has dark puddles along every crease.
That is cockling, and it happens because paper is made of fibers that swell when they get wet and shrink back as they dry. Stretching is the old, simple fix: you wet the paper so it expands fully before you paint, fix it to a board while it is expanded, and let it dry taut. When you paint on it later, it can only tighten, not buckle.
It sounds fussy. In practice it takes about ten minutes of work and a few hours of waiting, usually overnight.
When you actually need to stretch
Not every sheet needs it. The decision depends on the paper weight and on how wet you work.
| Paper | Light washes and dry brush | Heavy washes and wet-in-wet |
|---|---|---|
| 90 lb (about 190 gsm) | Tape the edges at least | Stretch it |
| 140 lb (about 300 gsm) | Tape the edges | Stretch, or tape firmly and accept slight cockling |
| 300 lb (about 640 gsm) | Nothing needed | Usually nothing; tape if you like |
| Watercolor block | Nothing needed | Nothing needed |
If you mostly paint on blocks, which are glued on all four sides, you can skip this whole note. The note on choosing watercolor paper explains blocks, pads and loose sheets in more detail. Stretching is for loose sheets, especially the lighter weights that are cheaper per square inch and lovely to paint on once they behave.
What you need
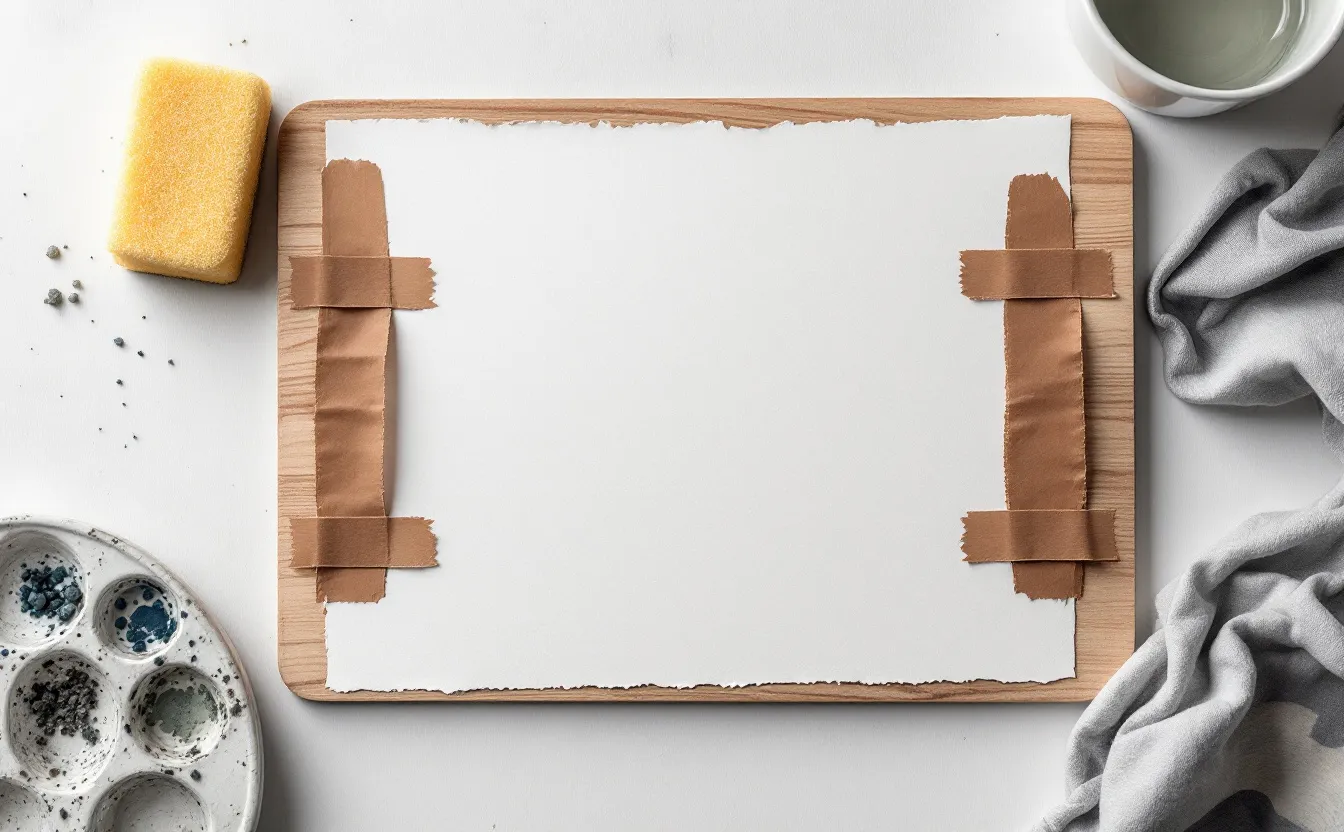
- A rigid board larger than the paper by at least an inch on every side. Plywood, MDF sealed with varnish, or a purpose-made drawing board all work. Avoid bare cardboard; it warps.
- Gummed paper tape, the brown kraft tape with water-activated glue, about 2 inches wide. Ordinary masking tape will not hold a wet sheet.
- A clean sponge and a tray, sink or bathtub for wetting the paper.
- Optional: a staple gun, if your board is soft enough to take staples.
- Scissors and a clean, lint-free towel.
Method one: gummed tape
This is the traditional method and the one that gives the flattest result.
- Cut four strips of gummed tape, each a few inches longer than the side of the paper it will hold. Keep them dry and nearby.
- Wet the paper evenly on both sides. For 90 lb paper, a quick dip in a tray of cold or lukewarm water, or a sponging on both sides, is enough. For 140 lb, soak it for three to five minutes. Heavy or hard-sized papers can need ten. Do not use hot water, which can soften the sizing.
- Lift the sheet by one corner, let the excess water drip off, and lay it flat in the center of the board.
- Smooth it gently from the center outward with a damp sponge or the side of your hand to push out air pockets. Do not stretch or tug the paper; the drying does the tightening.
- Wet one strip of tape with the sponge (not dripping, just glossy) and lay it along one edge, about half on the paper and half on the board. Press it down firmly.
- Repeat on the opposite side, then the other two. Opposite sides first keeps the tension even.
- Blot any pools of water on the surface with the towel.
- Let the board dry flat, at room temperature, away from direct heat. Overnight is safest.
As it dries, the paper will look alarmingly wavy at first, then pull itself flat and tight like a drum skin. Resist the urge to speed this up with a hair dryer while it is still very wet: uneven drying can pull the tape loose at one side.
Method two: staples
On a soft board such as basswood ply or a dedicated staple-friendly board, staples are faster and grip harder than tape, which helps with heavy sheets.
Wet and lay the paper exactly as above. Then staple around the edges about half an inch in from the edge of the paper, roughly every 2 inches, working from the middle of each side toward the corners and alternating sides. Some painters still run gummed tape over the staples to stop the edges lifting between them. When the painting is finished and dry, lift the staples with a staple remover or a flat blade and trim the perforated edge away if it bothers you.
Method three: the quick tape-down
If you do not want to wait overnight, there is a middle path that works well for 140 lb paper: tape the dry sheet down firmly on all four sides with a good artist's tape or masking tape, then paint. The paper will cockle slightly under heavy washes, but because the edges are held, it usually flattens again as it dries.
It is not as flat as a true stretch, and very wet work can still lift the tape. For sketches, studies and medium washes, it is often enough, and it leaves a crisp white border when you peel the tape off at an angle.
Painting on a stretched sheet
Wait until the paper is completely dry before you paint. A sheet that feels dry on the surface can still be damp in the middle and will slacken under the first wash. Touch the back of your hand to the center: if it feels cool, wait.
Painting on stretched paper feels different. Washes stay where you put them and dry evenly. You can tilt the board to let a gradient flow without worrying about the paper creating its own channels. Stretched paper also tends to dry a little slower, which gives you more time for wet-in-wet work.
Cutting the painting free
When the painting is finished and bone dry, run a sharp craft knife along the inner edge of the tape, where the tape meets the paper, using a steel ruler as a guide. Cut lightly, in two or three passes rather than one hard one. The painting lifts free with a clean edge; the strip of paper under the tape stays on the board.
Soak the old tape off the board with a damp sponge, scrape away the residue and let the board dry before you stretch the next sheet.
What goes wrong, and why
- The tape lifted on one side: Usually the tape was too wet or too dry, or the paper was very heavy for gummed tape. Wipe the board edge clean and dry before taping, and wet the tape just until glossy. For heavy sheets, use staples or a wider tape.
- The paper tore along the tape: It dried too fast or too unevenly, or was soaked too long and became weak. Let it dry slowly, away from radiators and sunny windows, and shorten the soak.
- The sheet dried with ripples anyway: Air was trapped under it, or it was not fully expanded before taping. Soak a little longer and smooth from the center out.
- Paint behaves strangely on the stretched sheet: Very long soaking in warm water can wash out some surface sizing. Shorten the soak, use cooler water, and avoid scrubbing the wet surface.
Choosing the right board
The board deserves a moment of thought, because it decides how well both tape and staples hold. Gummed tape grips best on a clean, smooth, slightly porous surface such as sealed plywood or a hardboard drawing board. Very glossy laminates can let the tape slide as the paper pulls, and raw MDF swells if it gets wet repeatedly, so give it a coat of varnish first.
For staples, the board needs to be soft enough to take them without bending: a basswood or poplar ply, or a dedicated gator board, works well. Whatever you choose, cut it a couple of inches larger than your usual sheet on every side, so tape and fingers have room. Many painters keep two or three boards so one sheet can dry overnight while another is being painted, which makes stretching feel much less like a delay. A board that size also gives you a convenient way to carry wet paintings from the table to a safe drying spot.
Questions people ask
Can I stretch paper after I have started painting?
Not really. Wetting the whole sheet again will disturb the paint. If a painting has cockled, you can flatten it afterward: lightly mist the back, place it face up between clean sheets of blotting paper under boards and weights, and leave it for a day or two.
Does stretching work for gouache too?
Yes. Gouache uses less water than watercolor in later layers, but the first thin layers can still cockle lighter papers. The note on what gouache is explains how its layers behave.
Can I reuse the board many times?
Yes. Clean off the tape residue each time. A board sealed with a coat of varnish lasts for years and releases old tape more easily.